In a compact kitchen, every square inch counts, and the pantry is no exception. Whether dealing with a closet-sized nook or no dedicated pantry at all, smart storage strategies can transform chaotic shelves into a streamlined system. Poor pantry design leads to expired goods buried in back corners, wasted vertical space, and countertops cluttered with displaced dry goods. The good news? Small kitchens can punch above their weight with the right combination of vertical storage, pull-out units, and creative use of dead space. This guide walks through practical, achievable pantry solutions that fit tight footprints without requiring a full kitchen remodel.
Table of Contents
ToggleKey Takeaways
- Small kitchen pantry organization prevents food waste, reduces prep time, and maximizes visibility by using transparent containers and shallow shelving that keeps everything at eye level and within fingertip reach.
- Pull-out pantry cabinets as narrow as 6 inches wide and over-the-door organizers are quick, effective solutions that reclaim dead space and fit into the tightest kitchen layouts.
- Vertical storage systems including adjustable track shelving, ladder-style units, and floor-to-ceiling pantry closets optimize unused wall space and prevent the deep-shelf problem where items get lost in the back.
- Quick DIY upgrades like lazy Susans, tension rods, wire baskets, and clear storage containers can be installed in a weekend with basic tools and minimal cost ($30–$100) to transform disorganized shelves.
- Always measure your space and choose modular, stackable, airtight containers that tile together efficiently, and use labels and task lighting to maintain accessibility and prevent duplicate purchases in small kitchens.
Why Smart Pantry Organization Matters in Small Kitchens
A cramped kitchen amplifies every organizational failure. When there’s no room for a walk-in pantry, inefficient storage creates a domino effect: ingredients get double-bought because they’re hidden, prep time stretches as cooks hunt for basics, and counters become permanent holding zones for cereal boxes and chip bags.
Well-planned small pantries deliver three core benefits. First, visibility: being able to see what’s on hand prevents overbuying and food waste. Studies from design sites like Apartment Therapy consistently show that transparent storage and uniform containers cut household food waste by 20-30%. Second, accessibility: items should be reachable without moving three other things. Third, density: storing more in less space without creating a game of Jenga every time someone grabs the olive oil.
Most small kitchen pantries fail because they rely on deep shelves with single rows of products. Standard 12-inch or 16-inch-deep shelving wastes the back half, cans and jars get shoved into darkness and forgotten. Successful compact pantries use shallow, tiered, or pull-out storage to keep everything at eye level and fingertip distance.
Creative Pantry Solutions for Tight Spaces
When square footage is limited, unconventional locations and specialty units fill the gap. Two standout approaches work in nearly any small kitchen layout.
Pull-Out Pantry Cabinets and Slim Storage Units
Pull-out pantry cabinets, also called slide-out or roll-out pantries, fit into narrow gaps as slim as 6 inches wide. These floor-to-ceiling units install between appliances, next to the fridge, or in formerly dead corner zones. Most models use full-extension ball-bearing slides rated for 75-100 lbs, letting homeowners access five or six shelves without bending or reaching.
Typical dimensions: 6-inch-wide units hold spices, oils, and condiments: 9- to 12-inch-wide units accommodate canned goods and boxed items: 15- to 18-inch-wide units function as a primary pantry for small households.
Installation requires basic carpentry skills. The cabinet box mounts to adjacent studs or cabinet frames using 3-inch wood screws, and the slides attach to both the cabinet carcass and the pull-out chassis. Some units are freestanding with a toe kick and finished sides, suitable for renters or anyone avoiding permanent modifications. Expect to spend 2-4 hours on a DIY install, assuming the opening is already framed and level. If framing a new opening, that’s structural work, verify it’s not load-bearing and pull a permit if local codes require it.
Slim freestanding units (often marketed as rolling pantry carts) work in rentals or kitchens where cabinet modification isn’t an option. Look for models with locking casters, metal frames, and a mix of open shelves and pull-out wire baskets.
Door-Mounted Racks and Over-the-Door Organizers
Over-the-door racks reclaim hollow-core or solid-core pantry and cabinet doors, adding 12-30 inches of vertical storage without tools. Most hang via metal hooks that slip over the door top: others screw into the door for a more permanent hold.
Choose racks based on door swing clearance. Measure the gap between the open door and the nearest wall or cabinet, most racks add 4-6 inches of depth. If clearance is tight, opt for slim models with shallow baskets (2-3 inches deep) for spices, packets, and foil rolls.
For heavier loads (canned goods, bottles), use screw-mounted racks. Pre-drill pilot holes to prevent splitting, especially on hollow-core doors. Standard #8 x 1-inch screws work for solid wood: for hollow-core doors, use toggle bolts or molly anchors rated for at least 20 lbs per anchor point.
Cabinet doors can also host command hooks or adhesive organizers for measuring cups, pot holders, or plastic wrap. Just keep weight under the adhesive’s rating, most peel-and-stick hooks max out at 3-5 lbs.
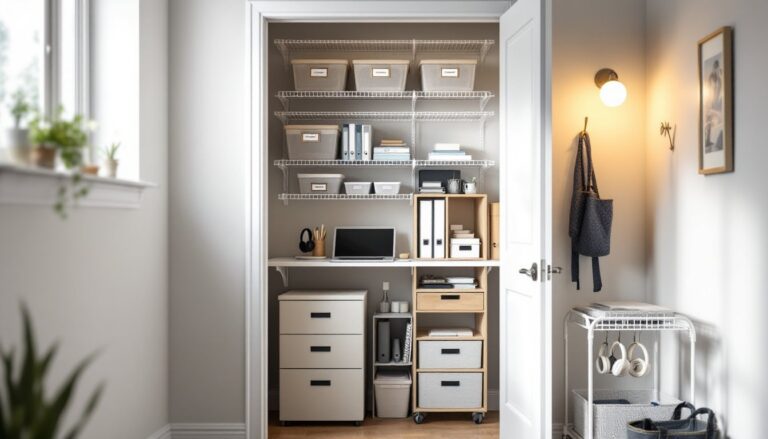
Vertical Storage: Shelving Systems That Make the Most of Wall Space
Small kitchens often waste the top third of wall height. Open shelving and adjustable track systems exploit that unused real estate without the bulk of upper cabinets.
Adjustable track shelving (like Elfa, ClosetMaid, or Rubbermaid configurations) mounts to wall studs and allows shelf height changes on the fly. Tracks install 16 inches or 24 inches on center, matching typical stud spacing, using 3-inch wood screws driven into studs or 1/4-inch toggle bolts for drywall-only spans. Each bracket typically holds 50-75 lbs, so a 36-inch-wide shelf supported by two tracks handles 100+ lbs safely.
Shelf depth matters. In tight kitchens, 6- to 8-inch-deep shelves prevent the unit from jutting into walkways and keep items visible. Reserve 12-inch depths for pantry closets or dedicated alcoves where reach isn’t an issue.
For renters or anyone avoiding wall penetrations, freestanding ladder-style shelving units lean against the wall and use a wide base for stability. Anchor the top with a furniture strap to prevent tipping, a simple nylon strap screwed into a stud does the job.
Sites like Remodelista often feature custom vertical pantries built from stock shelving and corbels, painted to match kitchen trim. That approach costs less than custom cabinetry but still delivers a cohesive look.
Pantry closets benefit from floor-to-ceiling coverage. Install fixed shelves every 12-16 inches for dry goods, spices, and small appliances. Use 1×12 pine boards or 3/4-inch plywood cut to width, supported by shelf pins or metal L-brackets screwed into studs. Prime and paint shelves with a semi-gloss finish for easy cleaning.
Add task lighting, battery-powered LED puck lights or plug-in strip lights, so the top shelves aren’t a black hole. Motion-sensor LEDs work especially well in pantries without overhead fixtures.
DIY Pantry Upgrades You Can Complete This Weekend
Not every pantry fix requires a carpenter. Several high-impact DIY storage ideas take just a few hours and minimal tools.
Lazy Susans and tiered risers organize corner cabinets and deep shelves. Standard 12-inch or 16-inch lazy Susans sit flat on shelves and spin for easy access to oils, vinegars, and condiments. Tiered risers (stair-step organizers) work for canned goods, letting you see labels at a glance. Both are drop-in solutions, no installation required.
Tension rods create vertical dividers for baking sheets, cutting boards, and lids. Measure the interior cabinet width, twist the rod to fit, and slide items between rods. Use spring-loaded rods rated for the item weight, budget rods can sag under cast-iron pans.
Adhesive hooks and rails mount inside cabinet doors or on pantry walls for bags, aprons, or reusable grocery totes. Clean the surface with rubbing alcohol before applying adhesive to ensure a strong bond. Wait 24 hours before loading hooks to let the adhesive cure fully.
Clear storage containers turn chaotic bags and boxes into a uniform grid. Square or rectangular containers nest more efficiently than round ones, maximizing shelf space. Look for airtight seals on cereal, flour, and sugar containers to prevent staleness and pests. Standard quart, half-gallon, and gallon sizes fit most pantry staples. Label containers with a label maker or chalkboard labels for quick identification.
These projects align with the principles behind effective pantry organization, making the most of existing space before committing to larger renovations.
Magnetic strips mounted on the inside of pantry doors or cabinet sides hold metal spice tins, freeing up shelf space. Use a stud finder to locate solid backing, or apply heavy-duty construction adhesive if screwing into particleboard.
All of these upgrades require only basic hand tools, drill, level, tape measure, and screwdriver. Total material cost runs $30-$100, depending on the number of organizers and the size of the pantry.
Smart Product Picks and Container Systems for Small Pantries
The right products make or break a compact pantry. Focus on modularity, transparency, and stackability.
Container systems: Oxo Pop containers, Rubbermaid Brilliance, and Ikea 365+ series offer airtight seals and clear bodies. Pop-top lids open one-handed, a plus when hands are floury. Brilliance containers are dishwasher-safe and nest when empty, saving storage space. Avoid impulse-buying mismatched containers, measure shelf height and width first, then choose container sizes that tile together without gaps.
Drawer organizers: Expandable bamboo or plastic dividers corral utensils, foil, and plastic wrap in shallow drawers. Spring-loaded dividers adjust to drawer width without tools.
Wire baskets: Sliding wire baskets under shelves or in cabinets keep potatoes, onions, and root vegetables ventilated, extending shelf life. The Kitchn recommends wire over solid bins for produce to prevent moisture buildup and spoilage.
Spice racks: Tiered spice racks or pull-down units make the most of shallow cabinet depth. Magnetic spice jars stick to the side of the fridge or a metal sheet mounted inside a cabinet door. For deep drawers, flat spice inserts let jars lie on their sides with labels visible from above.
Pegboard or slat wall panels: Custom pegboard inserts in pantry closets let homeowners rearrange hooks and shelves as needs change. Paint pegboard to match the kitchen, then add metal hooks and small wire baskets for bags, snacks, or lunch-packing supplies. Slat wall (the kind used in retail) offers a cleaner look and accepts proprietary baskets and shelves.
Label makers: Consistent labels (Brother P-Touch, Dymo LabelManager) turn a collection of containers into a system. Use a uniform font and size. Include purchase or expiration dates on bulk goods.
When selecting products, prioritize those that maximize the kitchen cabinet organization layout already in place, fitting seamlessly into existing cabinetry.
Avoid common mistakes: Don’t buy organizers before measuring. A gorgeous tiered shelf that’s 1 inch too tall is useless. Don’t choose opaque containers for pantry staples, visibility matters. And don’t overload adjustable shelves, refer to the manufacturer’s weight rating and stay within it.